Spirometry: getting the test right
Rachel Booker
Rachel Booker
Master, OU, former clinical lead, Education for Health
Freelance medical writer and editor
Spirometry is frequently performed in primary care, but this essential test is not as simple to administer as some practitioners believe. Healthcare professionals who conduct the test need to be adequately and appropriately trained if the results are to be meaningful
Spirometers are now widely available in primary care settings. This is, largely, to be welcomed. Spirometry is an essential investigation for accurately diagnosing COPD and many other respiratory diseases, and for distinguishing between respiratory and other causes of non-specific respiratory symptoms, such as cough and breathlessness. However, there is one, big caveat! Spirometry is effort dependent and incorrectly performed is useless. Poorly performed and interpreted, it can lead to misdiagnosis and missed diagnosis, with consequences for patient care and potential for medico-legal problems.
Evidence suggests an alarming level of misdiagnosis of COPD in general practice because the diagnostic spirometry performed in this setting fails to meet essential quality standards. A quarter of the people on COPD registers do not meet the diagnostic criteria and may therefore be taking inappropriate (and expensive) therapies.1 As important is the fact that these individuals are wrongly labelled as suffering from a serious and life-limiting condition, with all that entails - psychologically for the patient, and medico-legally for the practice.
The requirements for safe and accurate spirometry testing will be covered here. The interpretation of the results, beyond checking that the test is technically acceptable and valid, is beyond the scope of a 'primary care essentials' article.
TRAINING AND QUALITY ASSURANCE
The importance of training cannot be over-emphasised! Anyone undertaking to perform spirometry MUST be adequately trained for the task.
Diagnostic accuracy can only be assured if the spirometry on which it is based is valid. Diagnostic spirometry should only be performed by people who have been trained and assessed to Association for Respiratory Technology and Physiology (ARTP) or equivalent standards by recognised training bodies.1,2 A UK survey found that only 20% of practice nurses regularly using spirometry to diagnose COPD had received accredited training.3 We have a considerable way to go before acceptable standards are achieved.
Quality assurance systems for primary care spirometry are currently limited. The need for them has been recognised by Primary Care Commissioning,1 and there is a statement about what patients and carers want in the Outcomes Strategy for COPD and asthma, namely:
'"¦ timely access to quality assured assessment and diagnostic services.'4
The current paucity of quality assurance systems is, hopefully, set to improve.
EQUIPMENT
Stand alone, hand held spirometers should not be used for diagnostic spirometry. Their use should be confined to screening, to detect those who need to be referred for full, diagnostic spirometry, and for monitoring once reliable, diagnostic spirometry has been carried out.
A spirometer should comply with International Standard Organisation standard 26782.5 The essential and desirable features of a spirometer, and those to avoid, are listed in Table 1. Other equipment that will need to be available is listed in Box 1.
CALIBRATION
All spirometers need to be regularly calibrated with an annually certified, 3 litre calibration syringe that reads +/- 3% of true.5 Manufacturers of some spirometry equipment maintain that this is not necessary for their spirometers, but this goes against national and international guidelines and the recently published PCC document.1,2,6 Regular calibration checks are the only means you have of ensuring that your spirometer is accurately measuring your patient's lung function.
Calibration should be checked prior to every session, or after every 10th patient, whichever comes first. A log of calibration checks, together with any servicing or maintenance, should be kept for medico-legal reasons.
INFECTION CONTROL
Incidences of cross-infection from spirometry equipment are rare. That said, it is still essential that spirometers are regularly cleaned and maintained, according to the manufacturer's instructions.
Disposable, plastic gloves should be used for handling mouthpieces and nose clips. Hand-washing is a simple and effective method of preventing cross-infection and should be routine before and after handling spirometry equipment and between patients.
For expiratory manoeuvres in primary care settings disposable, one-way mouthpieces are sufficient. Inspiratory manoeuvres are rarely necessary and require the use of the considerably more expensive viral and bacterial filters.
Patients with known or suspected respiratory infection should not be tested. Not only is the test likely to be unhelpful, there is also a risk of contaminating your spirometer. Decontamination can be costly. In the very rare instance of spirometry being urgently required for a patient with an infection, viral and bacterial filters must be used, the patient tested at the end of a session and the equipment carefully cleaned after use.
Immunocompromised individuals should be tested with clean equipment at the start of a session.
PRE-TEST INSTRUCTIONS FOR PATIENTS
Spirometry can be performed opportunistically but it is helpful to give patients instructions to help them prepare. These will vary according to the reason for doing the test. It will save time, and aid adherence to instructions, if you have information and instruction sheets to give to patients. If you ask them to sign these instructions they can also serve as consent to the procedure.
Before spirometry testing all patients should be advised to avoid:
- Smoking for at least 24 hours
- Eating a large meal within 2-4 hours
- Vigorous exercise within 30 minutes
- Wearing tight clothing.
If they are taking inhalers they should bring them to the appointment. It is also sensible to ask them to arrive in plenty of time so that they can sit and relax for a few minutes and visit the toilet. 'Accidents', or fear of them, can be a barrier to maximum expiratory effort.
Diagnostic spirometry
This involves base-line testing of patients in whom a firm diagnosis has yet to be made. If airway obstruction is found on base-line testing, reversibility testing may then be indicated.
Post-bronchodilator spirometry
Post-bronchodilator spirometry recordings are recommended for the routine monitoring of patients with diagnosed asthma and COPD.1,7,8
Reversibility testing
Reversibility testing is recommended to confirm suspected asthma.8 It is not routinely required to confirm a diagnosis of COPD,7 but may be useful in distinguishing between COPD and asthma when the clinical history is unclear.
Instructions and procedures are summarised in Table 2.
CONTRAINDICATIONS AND CAUTIONS
Spirometry is generally safe, but requires patients to make a maximal forced expiration. There are two absolute contraindications and a number of relative contraindications.9 (Box 2)
You should not assume contraindications have been considered before a patient is referred to you. You should always check before you proceed. If you are in doubt then refer to the GP or get advice from your local pulmonary function laboratory.
RECORDING PATIENT DATA
What constitutes normal lung function for any individual — the reference value — is determined from the individual's height, age, gender and ethnicity. Data, including the patient's identifier, date and time, must be accurately entered into the spirometer since inaccuracies, such as forgetting to change the gender setting or ethnicity, will invalidate the results.
Measure height, without shoes. Do not accept previously recorded measurements and never accept a person's verbal report of how tall they are! Weigh the patient. Abdominal fat in obese individuals can restrict lung volumes and the person's weight is therefore useful for interpreting the results.
The most commonly used reference values are from the European Coal and Steel Community.10 These relate to European ethnic groups and correction factors have been devised to adapt them for other races. Recently, the Global Lungs Initiative has developed new reference values,11 but it will be some time before these are widely accepted and incorporated into the software of all existing spirometers. Until then ethnicity should be recorded according to your spirometer manufacturer's instructions and applied consistently for future spirometry recordings with that individual.
CONDUCTING THE TEST
Check adherence to preparation instructions and record any deviation. Check there are no contraindications to performing spirometry today.
Sit the patient down and make sure they are sitting upright, with both feet on the floor. Forced expirations can make people feel faint and they are not safe standing up. False teeth should be left in, unless they are very loose.
Explain the test: they will be asked to blow into the spirometer several times and for part of the test it is vital that they blow out as hard and as fast as they can.
You are now ready to begin! Your role as coach, encouraging, instructing and supporting the patient during the test is absolutely vital.This is why adequate training is essential.
Relaxed vital capacity (VC)
The VC (sometimes also referred to as RVC) should always be recorded. It is defined as:
'The maximum volume of air that can be expired from the lungs during a relaxed, but complete expiration from a position of full inspiration.'12
Airways are normally compressed a little during a forced expiration and the VC can be a truer reflection of vital capacity than the forced vital capacity, particularly in patients with obstructive airways disease.
One demonstration is worth a thousand words, so, if possible, demonstrate the technique first, using a mouthpiece.
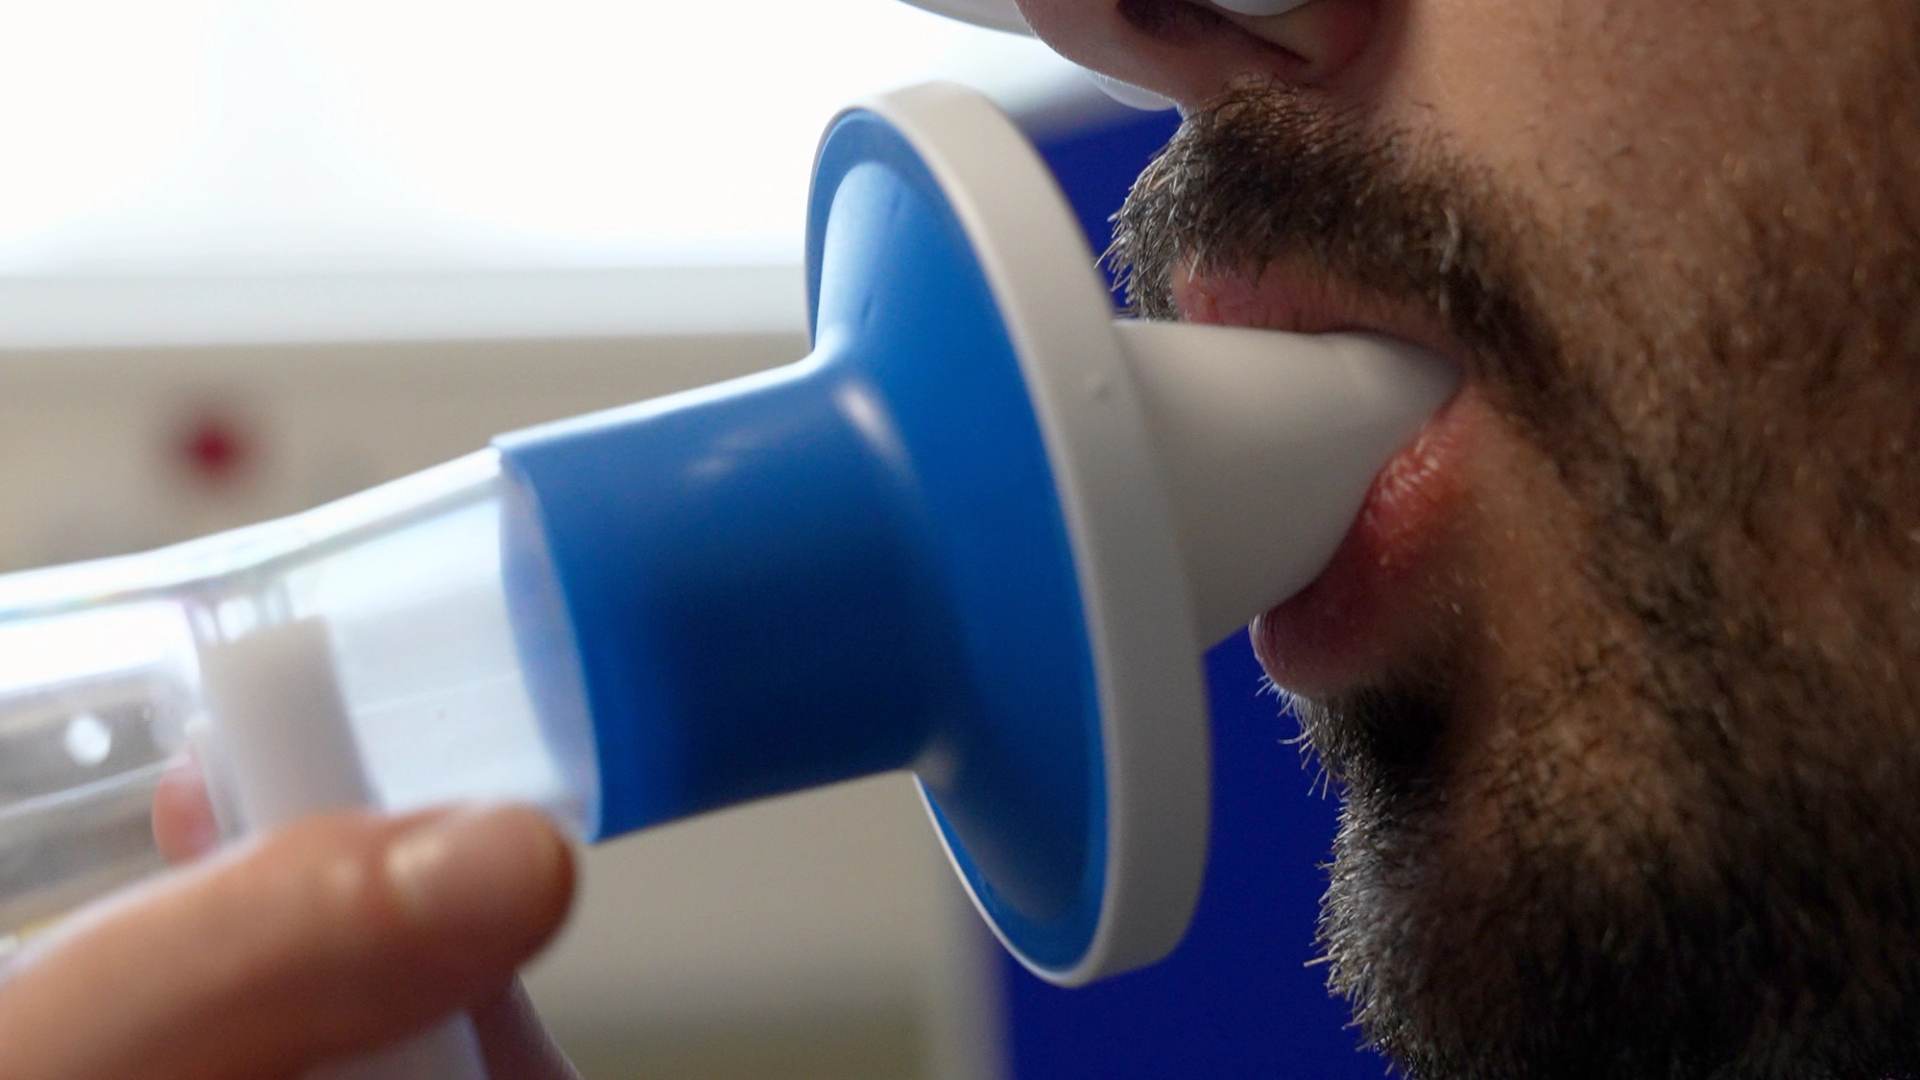
Put a nose clip on the patient (or get them to pinch their nose) and encourage them to take as big a breath in as they can. They should completely fill their lungs and then, with minimal delay, insert the mouthpiece (making a good seal with their lips and keeping their tongue and teeth out of the way) and exhale, gently and steadily, into the spirometer. The exhalation should be unforced, like a 'big sigh'. You will need to encourage them to continue exhaling until they have squeezed out every last drop of air. The graphic display of the volume/time trace should have reached a plateau for at least 1 second and the flow/volume trace merged with the horizontal axis. Some spirometers have an audible signal when flow through them has ceased. Allow the patient to recover for a minute or two before asking them to repeat the blow.
Observe and encourage the patient throughout to ensure that they produce technically acceptable results. Make sure they maintain a seal around the mouthpiece, do not cough, hesitate during the exhalation, or take an extra breath.
You will need at least three, technically acceptable VC recordings. This is normally achieved with no more than four manoeuvres. To ensure reproducibility these three recordings should ideally be within 100ml (and no more than 150ml) of each other.1,6,13
Forced vital capacity (FVC) and forced expiratory volume in 1 second (FEV1)
When you have recorded three technically acceptable, reproducible VC recordings you can proceed to the forced manoeuvre. This will give the other three, vital parameters of lung function:12
- FVC: 'The maximum volume of air that can be expired from the lungs during a forced and complete expiration from a position of full inspiration.'
- FEV1: 'The maximum volume of air that can be expelled from the lungs in the first second of a forced expiration from a position of full inspiration.'
- FEV1/FVC ratio: 'The amount of air blown out in the first second of a forced expiration from a position of maximal inspiration expressed as a percentage of the total amount expired (regardless of time) during that forced manoeuvre.'
Nose clips are not necessary, but can be used if there are problems achieving reproducibility. Again, it is helpful to demonstrate the technique first, if possible.
Ask the patient to take a maximal breath in and place the mouthpiece in their mouth, as before. Once they have completely filled their lungs they should, without delay, exhale AS HARD and AS FAST as possible, using absolutely maximum effort, and continue to blow hard until they are unable to exhale any further.
This is hard work. You will need in instruct the patient to 'Really blast the air out as hard and fast as you can, right from the start,' and you need to give continual encouragement to"¦ BLOW"¦ KEEP GOING"¦BIT MORE"¦. until the graphic display (or audible signal) tells you that they have exhaled completely.
Again you should observe the patient throughout to ensure that:
- They have taken a maximal breath in
- They do not obstruct the mouthpiece
- There is no leakage of air around the mouthpiece
- They have not hesitated at the start of the blow and have made a maximal effort throughout.
You will need a minimum of three technically acceptable forced manoeuvres, but should not ask the patient to perform more than eight in a single session. Reproducibility is achieved when there is less than 100ml (and no more than 150ml) difference between the three best, technically acceptable blows.1,6,13
Reporting
Record how well the patient was able to follow instructions, and any difficulties you encountered with the test. This can aid interpretation of the results.
As you are conducting the test you should note any problems with each relaxed and forced effort. For example, the highest of the VC recordings that appears on your spirometer print-out may have been the one where the patient took an extra breath in. If the person interpreting the result does not know this then they may use this technically unacceptable and invalid result, rather than the valid, lower figure.
When the test is complete, make a final check:
- The patient data is recorded correctly
- You have recorded the quality of each of the patient's efforts
- You have three technically acceptable and reproducible VC efforts
- You have three technically acceptable forced manoeuvres
- The volume/time and flow/volume traces do not reveal any technical errors (See below)
COMMON ERRORS
The graph of volume against time, the volume/time trace, should always be smooth and upward curving and should reach a plateau for at least one second. The graph of air flow rate against volume, the flow/volume trace, should rise almost vertically before dropping down to merge with the horizontal axis. Normal volume/time and flow/volume traces are illustrated in Figure 1.
There are several common errors you will encounter when conducting spirometry tests and it is important to detect, and correct, them.
Sub-maximal effort
This will result in non-reproducible results, i.e. you will not be able to achieve the 100ml or less variability between efforts. You will need to explain the procedure again, emphasising the need to blow as hard as possible, and give vigorous, verbal encouragement.
Coughing
You will have observed and recorded the fact that the patient coughed during the test and the volume/time trace will be irregular, rather than smooth and upward curving.
Coughing can be a particular problem in patients with uncontrolled asthma or bronchial hyper-reactivity. You may be able to overcome the problem by allowing the patient sufficient time to recover and rest between efforts, but if coughing is persistent you may have to abandon the test. If you have managed to record technically acceptable relaxed blows and the patient has managed a forced manoeuvre of more than 1 second before coughing relevant information may still be obtainable and all may not be lost! The ratio of FEV1 to VC can be calculated and used to indicate whether airflow obstruction is present.
Failure to empty the lungs completely
This is a common problem and can give very misleading results if it is not detected. The volume/time trace will fail to plateau and the flow/volume trace will 'drop off' and fail to merge with the horizontal axis. (Figure 2)
You will need to verbally encourage the patient to continue to 'blow, keep going"¦' Some spirometers have built-in incentive software (e.g. blowing balloons) that can also help.
Slow start to the forced manoeuvre
This is another common problem. The patient fails to make a maximal effort at the start of the blow, giving an 'S' shape to the start of the volume/time trace and a flow/volume trace that does not rise almost vertically.(Figure 3)
Air leak
Individuals with facial palsy, or loose false teeth, may have difficulties creating a tight seal around the mouthpiece and will leak air around it as they exhale. This will cause the volume/time trace to 'dip' downwards rather than rise steadily and smoothly upwards. (Figure 4)
CONCLUSION
Fifteen years ago a spirometry article in a section about the essentials for primary care practice would have seemed absurd. Then it was an almost exclusively specialist procedure carried out in lung function laboratories and secondary care. Indeed, even peak flow meters were a rarity in primary care 20 years ago. The diagnosis of all varieties of lung disease was, until relatively recently, made on purely clinical grounds. Following the publication and dissemination of national and international guidelines for COPD and asthma, and spurred on by the monetary incentives provided under QOF, this situation has changed.
Spirometry, properly conducted and accurately interpreted by adequately and appropriately trained personnel, is a valuable tool that will allow a large number of people with respiratory disease to be promptly diagnosed and appropriately treated and monitored in a primary care setting close to their homes.
REFERENCES
1. Primary Care Commissioning. A guide to performing quality assured diagnostic spirometry. PCC. 2013 http://www.pcc-cic.org.uk/article/guide-quality-assured-diagnostic-spirometry
2. Levy ML, Quanjer PH, Booker R et al. Proposed standards for general practice compliant with American Thoracic Society and European Respiratory Society recommendations. Primary Care Respiratory Journal 2009; 18(3): 130-147 http://www.thepcrj.org/journ/vol18/18_3_130_147.pdf
3. Upton J, Madoc-Sutton H, Sheikh A, Frank TL, Walker S, Fletcher M. National survey on the roles and training of primary care respiratory nurses in the UK in 2006: are we making progress? Primary Care Respiratory Journal 2007; 16(5):284-90. http://dx.doi.org/10.3132/pcrj.2007.00068
4. Department of Health. An outcomes strategy for chronic obstructive pulmonary disease (COPD) and asthma in England. DH. 2011 https://www.gov.uk/government/uploads/system/uploads/attachment_data/file/216139/dh_128428.pdf
5. International Organisation for Standardisation. www.iso.org/iso/store.htm
6. American Thoracic Society. Guidelines for the measurement of respiratory function. Respiratory Medicine 1994; 88: 165-194
7. National Clinical Guideline Centre. Chronic obstructive pulmonary disease: Management of chronic obstructive pulmonary disease in adults in primary and secondary care: Update guideline. 2010 www.nice.org.uk/cg101
8. BTS/SIGN. Asthma Guideline. 2012
http://www.brit-thoracic.org.uk/guidelines/asthma-guidelines.aspx
9. Cooper BG. Review: an update on contraindications for lung function testing. Thorax 2011; 66:714-723
10. Quanjer PH, Tammeling GJ, Cotes JE et al. Lung volumes and forced ventilatory flows : Report working party standardization of lung function tests. European Community for Steel and Coal. Official statement of the European Respiratory Society. European Respiratory Journal 1993; 6(suppl 16): 5-40
11. Global Lung Function Initiative. 2012 http://www.lungfunction.org/component/content/article/86-about-gli/149-about-gli-home.html
12. British Thoracic Society, Association of Respiratory Technicians and Physiologists. Guidelines for the measurement of respiratory function. Respiratory Medicine 1994; 88: 165-194
13. Miller M R, Hankinson J, Brusasco V et al. Standardisation of spirometry. European Respiratory Journal 2005: 26(2); 319-38.


Related articles
View all Articles